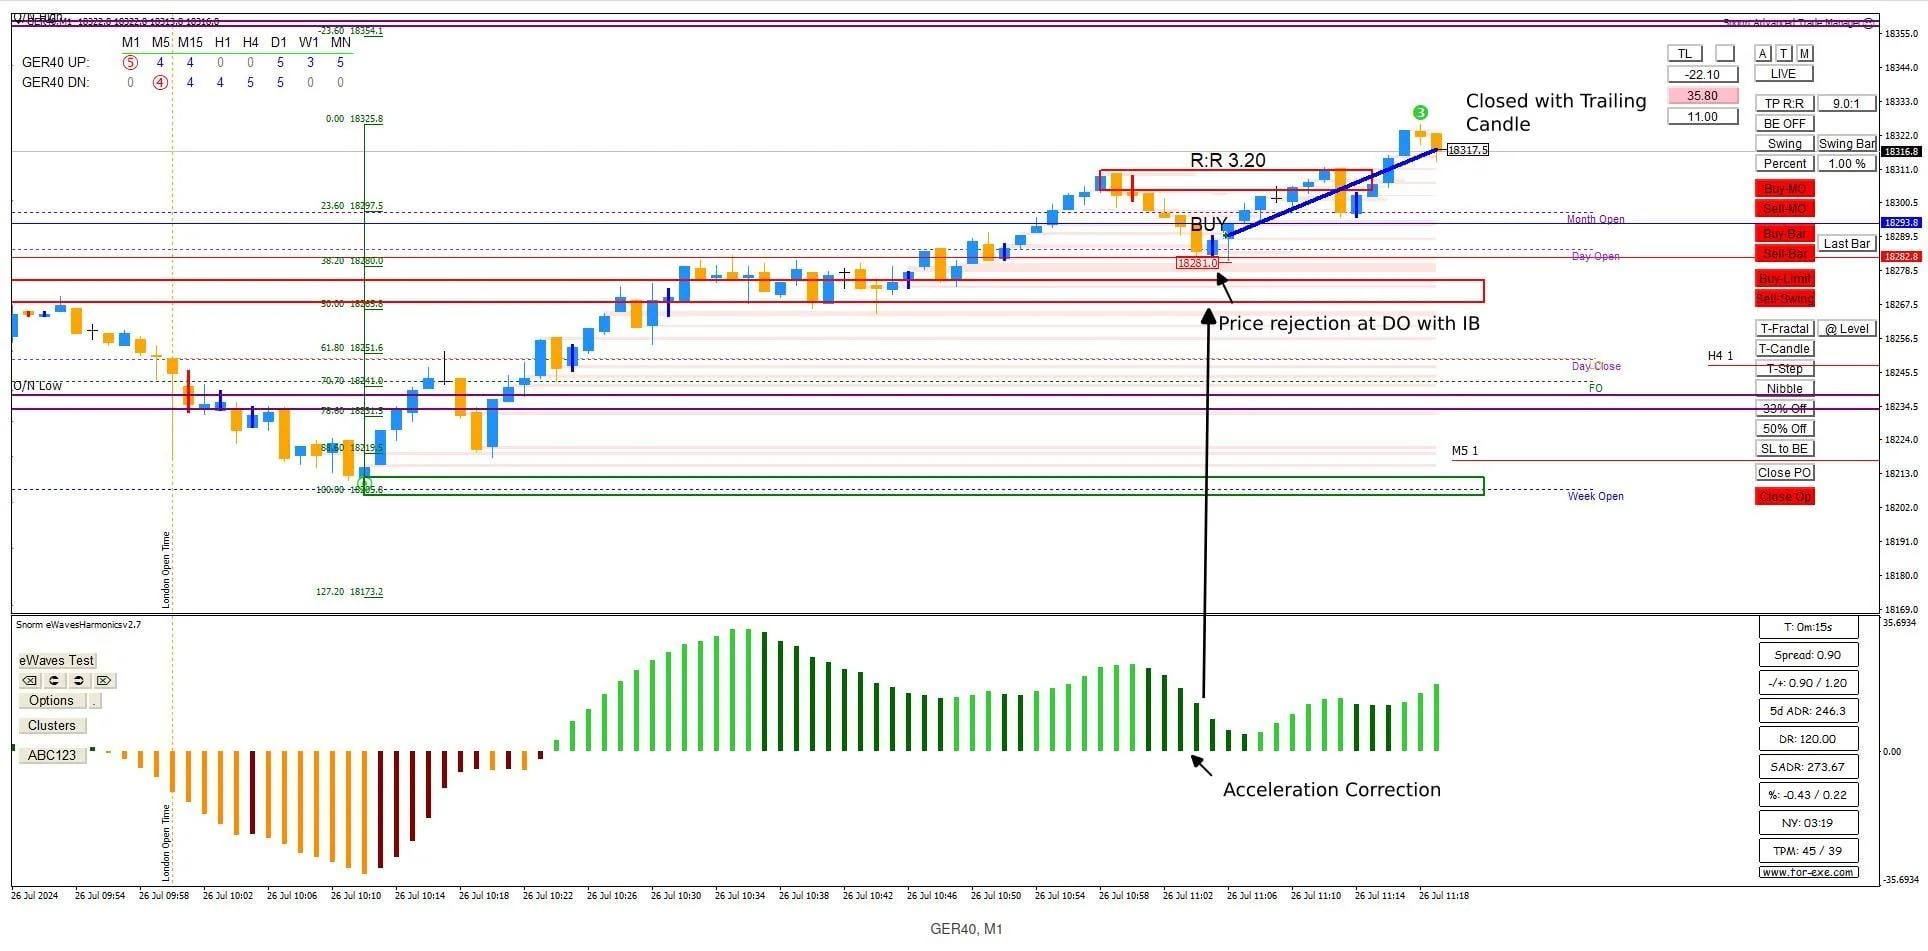
Here is another example of a trade using the strategy from Buy the dips, sell the rallies — almost the same setup, but the result could have been better. The entry was fine. The problem was the exit: no target, and an emotional decision to get out early.
The trade — M1 entry

M1 — price rejection at Day Open with Inside Bar (IB), Acceleration Correction visible in eWaves, 3.20R exit
The setup was clean — price rejection at the Day Open with an Inside Bar, Acceleration Correction confirmed in eWaves. Entry was good. The exit at 3.20R was the result of not having a plan.
How it played out
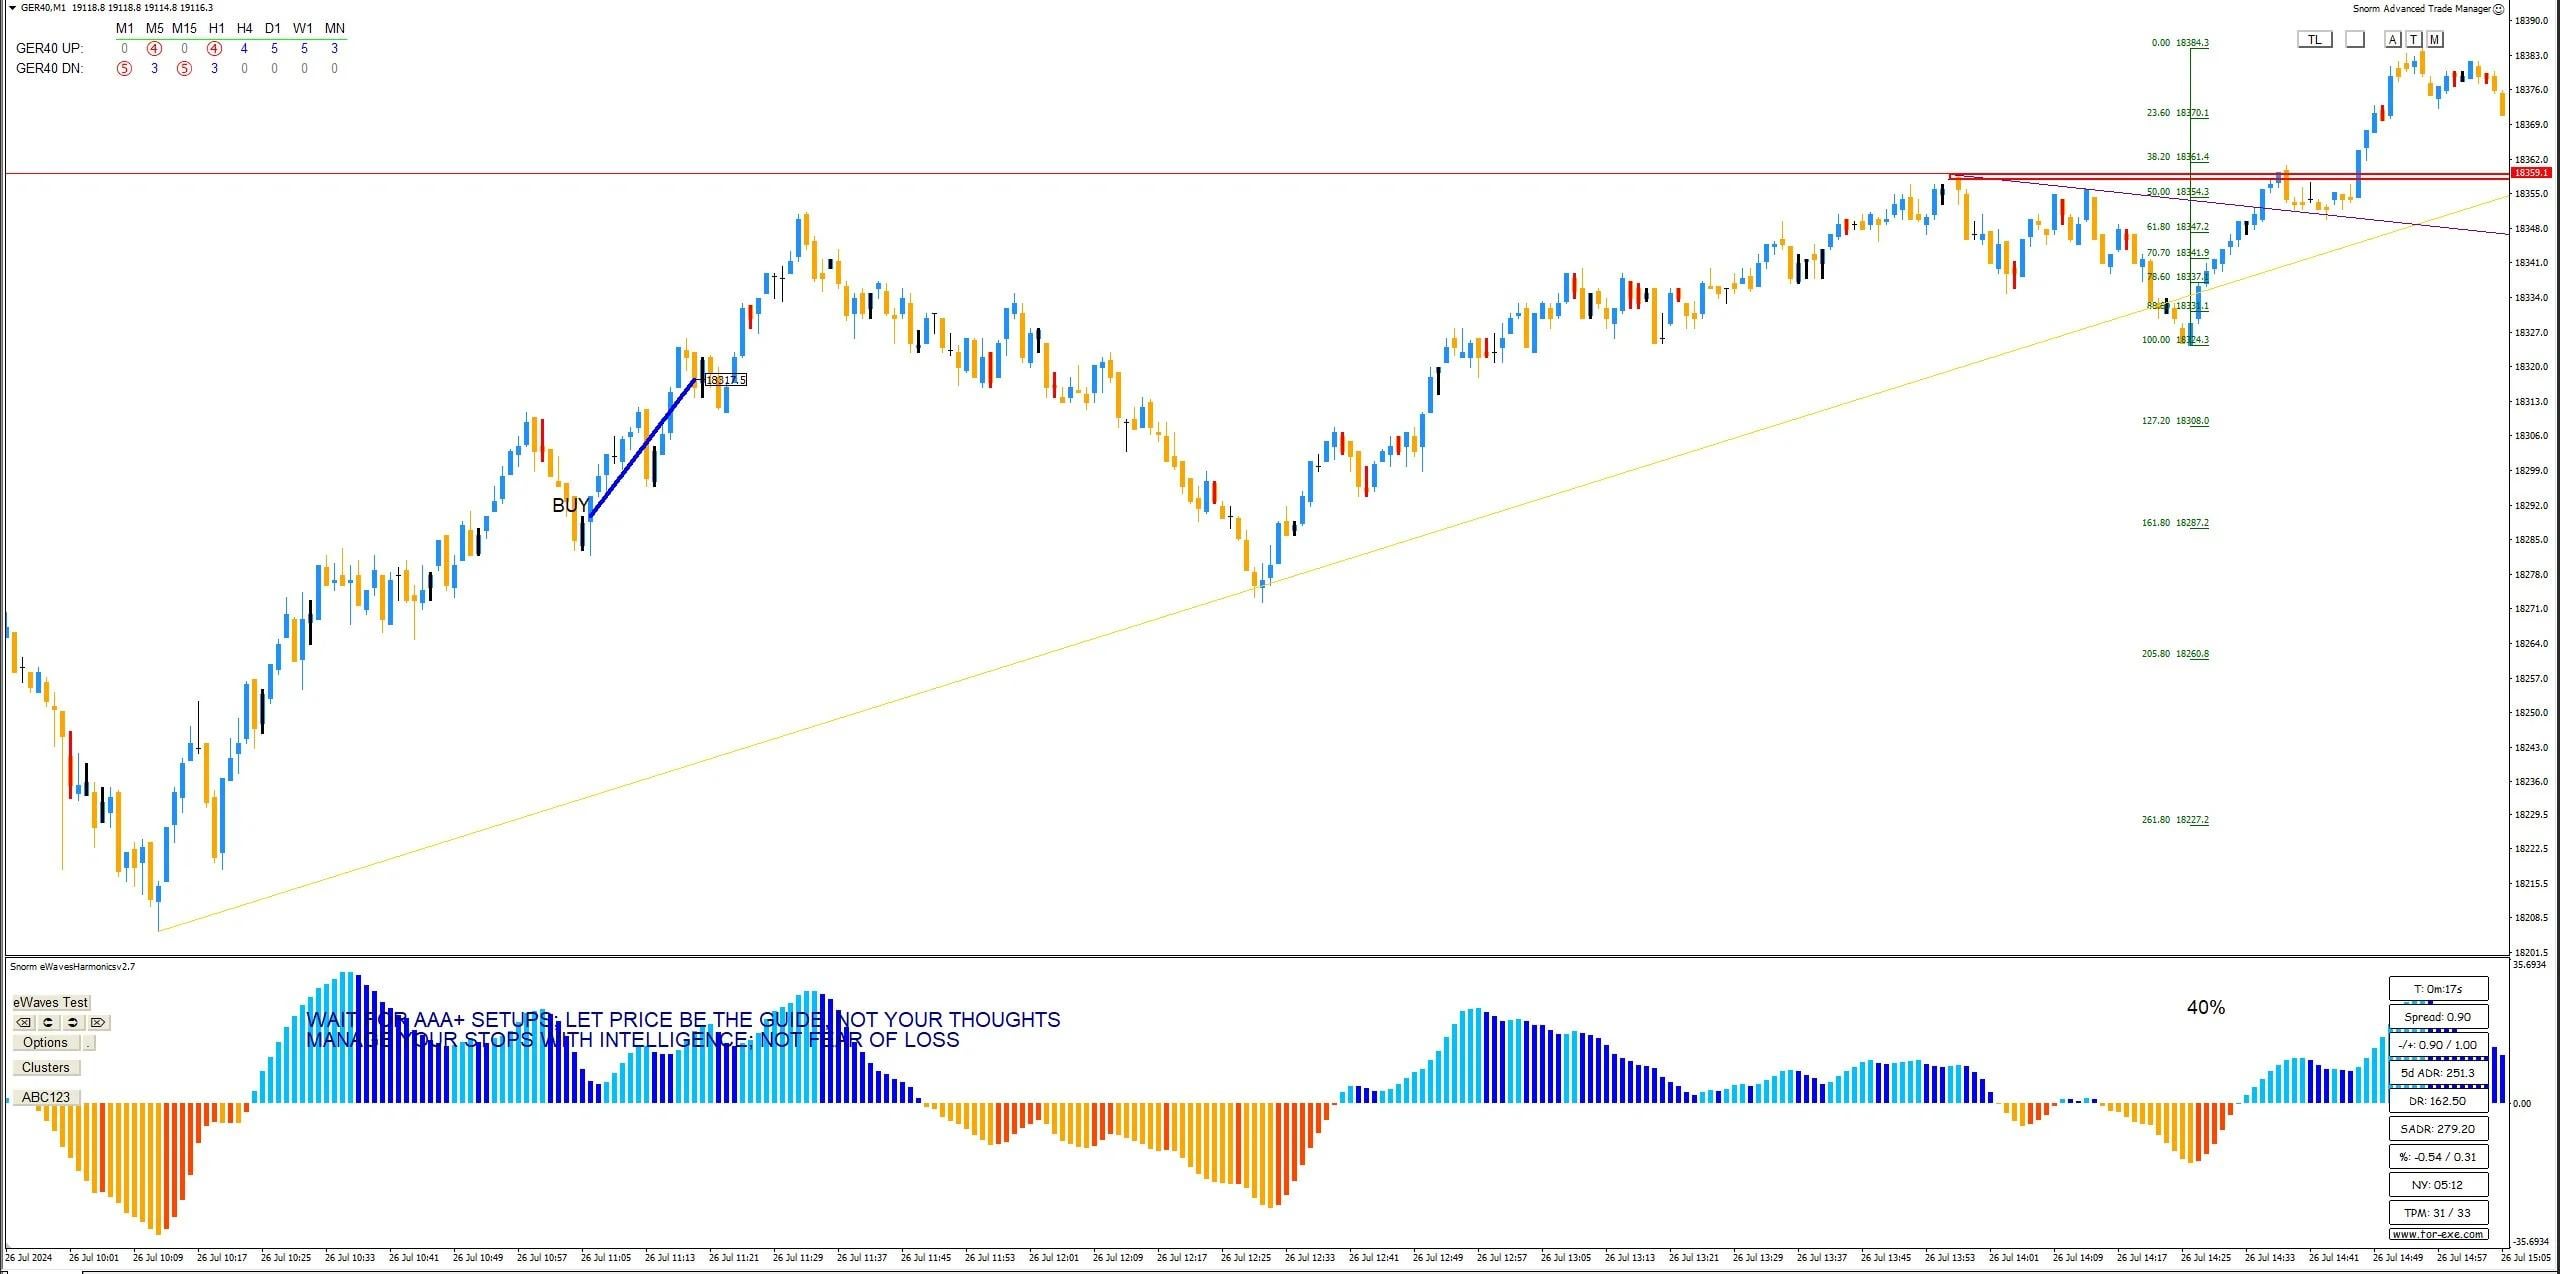
M1 — the full move. A target at the right level would have captured close to 6R.
Looking at M1 as the trade played out, there was a possibility of close to double the profit — a potential 6R trade. There is always a risk of giving back profits if the target isn’t reached, but there is a good likelihood that price will reach a key level before it retraces again. That level needs to be identified before the trade is taken.
Good target levels to look for: key session levels, supply and demand zones, support and resistance, or Fibonacci levels. I’ll typically use M5, M15, or occasionally H1 for this.
M15 — the target that was there
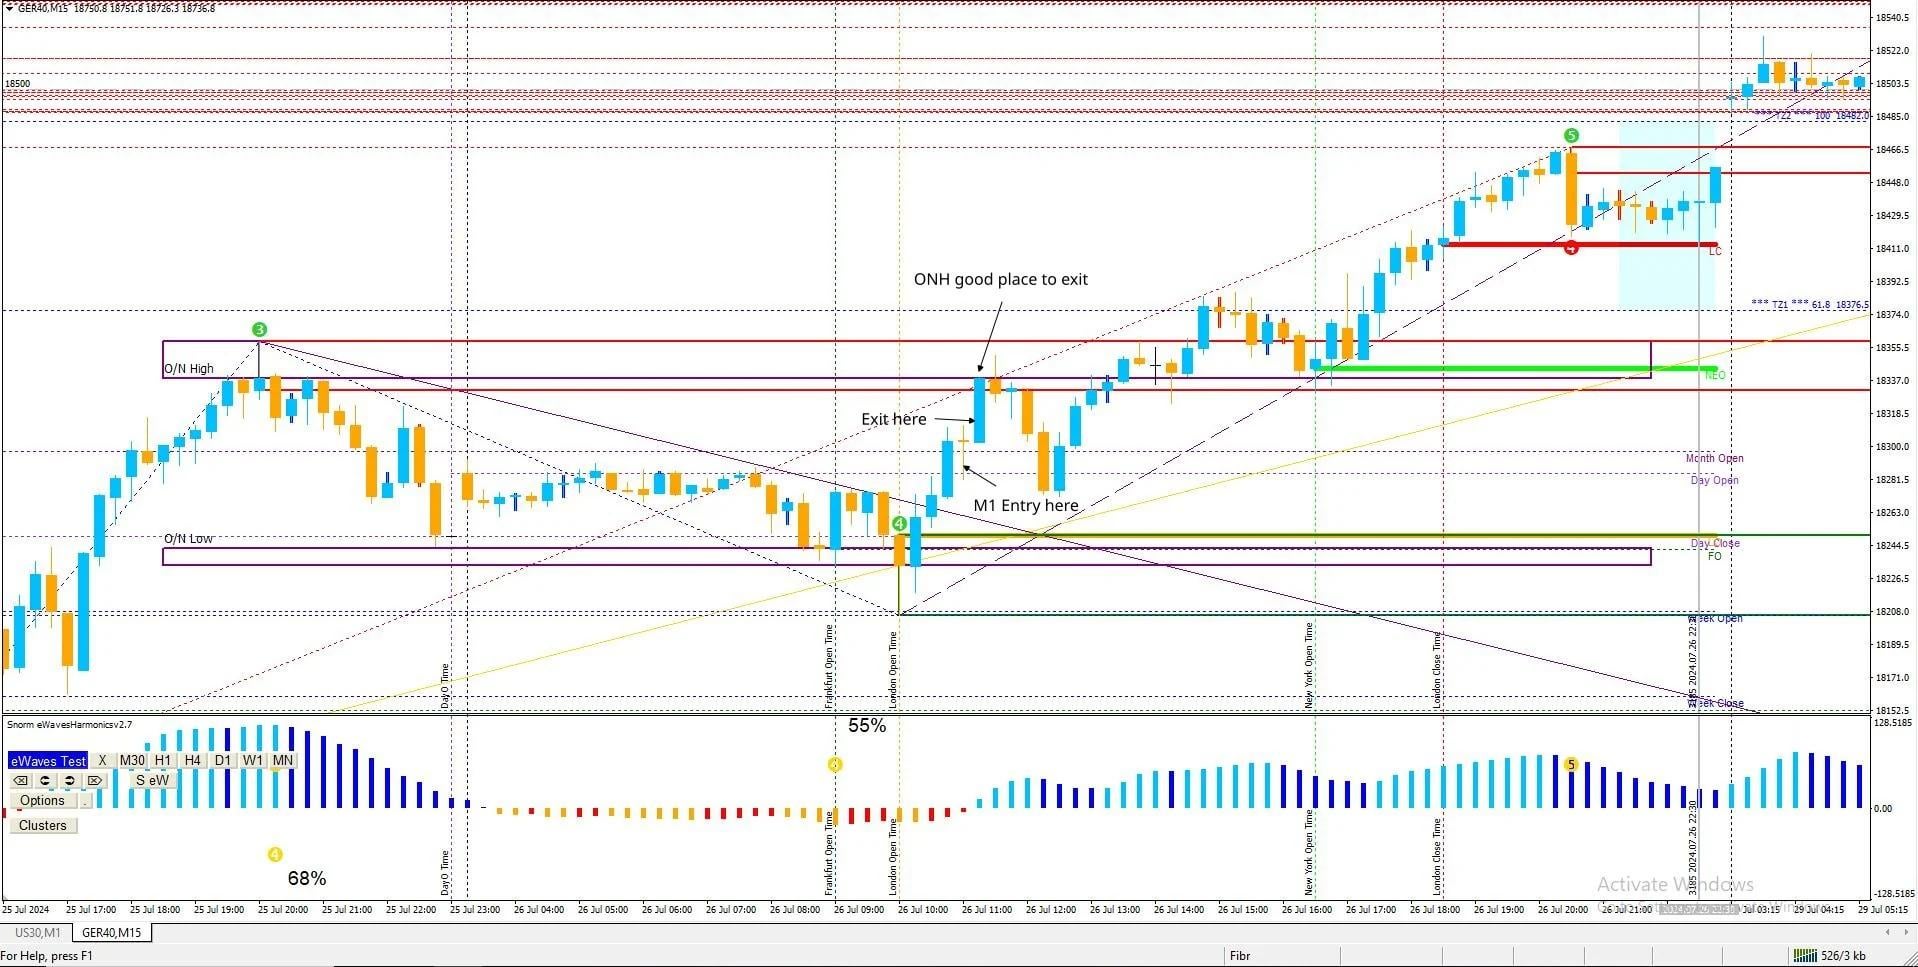
M15 — Overnight High (ONH) supply/demand zone was the obvious target. Entry and both exits marked.
On M15 there was a clear supply and demand zone at the Overnight High (ONH) — an obvious target that was sitting there before the trade was even taken. With that target in mind, the exit plan writes itself.
Summary — why targets matter
- Know the potential R:R before entering — if it doesn’t meet your minimum, don’t take the trade
- Direction — a target gives you a reason to stay in one direction and not second-guess the trade
- An exit plan removes emotion — a trailing stop or take profit at a defined level avoids the early exit that cost R here
- Better chance of higher profits — letting price reach the target rather than exiting on feel
The market always offers clues about where price is likely to go. Do the work on the higher time frames first, set the target, then let the trade run.